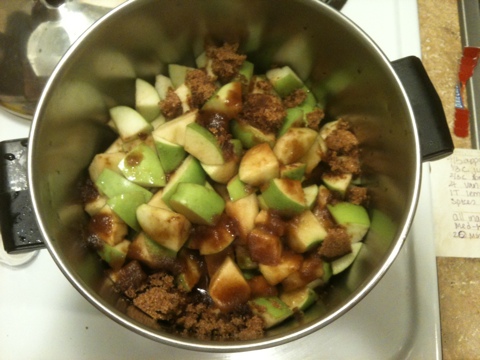
recipes

Recipes I’ve tried or created. All were delish!

Pork Stir Fry with Lots of Veggies

oPork Stir Fry | BeccaBlogs.comLooks delish, no?

So, the problem with going out of town for 4 days is trying to eat up all the food in the house the can potentially spoil while we’re gone. In our case, it was tons of fresh veggies. We pretty much leave all our meats in the freezer until we’re ready to use them, so that wasn’t an issue. There was a good deal of veggies we didn’t use and when we returned, it was starting to look a bit… peaky. So now what?

Enter Stir Fry!

There is absolutely nothing scientific or specific about a stir fry recipe. Seriously, grab every vegetable in your house, add some meat, chop it all up and saute in a huge frying pan or, if you have one, a wok.

In my case, our “recipe” was as follows:

1.5 lbs pork cut onto “thumb size” chunks
3 bunches broccoli
1/2 head of cauliflower
5-6 carrots
2 onions
4-5 cloves of garlic (to taste)
1 can water chestnuts
1 can baby corn
4-5 stalks celery
8 oz mushrooms
Corn oil
Brown sugar
Low sodium soy sauce
Rice or pasta

I chopped everything into bite size pieces in advance. This makes it way easier when dumping them all into the frying pan.

Heat up enough oil (your preference, I used corn oil) to cover the bottom of the frying pan. Throw the onions, carrots, celery, and garlic in to saute. When the onions look cooked “enough” to you, throw the pork chunks in to cook. Alternately, you could cook them separately, but I opted to cook them with the veggies to absorb all those delicious flavors.

At this point, my frying pan was too small. Good thing I have an electric wok within reach. Everything got tossed into the wok, along with the cauliflower, broccoli, baby corn, mushrooms and water chestnuts. I liberally shook the soy sauce over the entire mixture and put the lid on to simmer until the veggies are cooked to your liking.

My secret ingredient is to sprinkle brown sugar over the mixture just before serving. It makes the entire thing both savoy and sweet.

Serve over rice or pasta.

Enjoy your creation!

spacer

St. Patrick’s Day Cooking

St Patricks banner | BeccaBlogs.com
Happy St Patrick’s Day to all my Irish and “I wish I was Irish” friends out there! I fall into the latter category, but that doesn’t stop me from having a 4-leaf clover and a Celtic triskele tattoos on my ankle. Nor does it stop me from loving the heck out of all things Irish. OK, except the beer. But I don’t drink any beer so I figure it’s a moot point anyhow. Today on one of my favorite holidays, I am making one of my all time favorite meals: Corned Beef and Cabbage.

You know you love it too! It’s seriously one of the easiest things to make too. I’ve never made it in a crock pot before, so this is a new recipe for me. Normally I boil it for hours then bake it to let the sauce cook it. I’ll post that recipe as well.

Corned Beef and Veggies cooking | BeccaBlogs.com

But for today, I am following the “Traditional Corned Beef and Cabbage” recipe that I found via Crock-Pot.com. Actually, I got it from their iPhone app, but it’s the same thing really.

Ingredients
12 new potatoes quartered
4 carrot(s) sliced
4 pounds corned beef brisket
2 onion(s) sliced
3 bay leaves
8 black peppercorns
1 head cabbage wedged

Directions
* Place potatoes and carrots in bottom of slow cooker.
* Add brisket, onion, bay leaves and peppercorns.
* Add enough water to cover. Cook on Low 8-10 hours or High 4-5 hours.
* Add cabbage halfway through cooking.

Now, here’s the thing. I generally followed the above recipe. I left out the bay leaves and peppercorn, used 8 white potatoes, and only 2.5lbs of corned beef. What I don’t understand is how they managed to cram all that food into a 6qt crock pot. With my modifications, the lid barely fits. I can’t even imagine how over crowded it would be with 1.5lbs more of meat. Hopefully it will shrink enough for me to cram the cabbage into the pot in about 4 hours.

St. Patrick's shamrocks | BeccaBlogs.comMy go-to recipe is not only super easy, but unbelievably delicious as well. I’ve been making this version for well over 10 years and not just on St. Patrick’s Day. It’s great any time of the year!

Brown Sugar/ Mustard Glazed Corned Beef and Cabbage

Ingredients
Corned Beef
1 head of Cabbage
Red potatoes
Carrots
Brown Sugar
Yellow Mustard

This is much more of a guideline, than a recipe. Make enough to feed your family. And don’t forget that the corned beef will shrink roughly 1/3 of it’s original side after cooking.

Follow package directions to boil the corned beef and enclosed flavor packet. This usually takes several hours. You can either trim the excess fat or leave it. I leave it because it adds to the flavor while cooking.

Cut the potatoes and cabbage into quarters and slice the carrots. Place around the corned beef and completely cover with water.

Once the corned beef is fully cooked and extremely tender, remove from water and let cool for about 10 minutes. Leave the vegetables in the water, but turn off the heat.

Preheat the oven to 325*.

Mix the brown sugar and yellow mustard together. The ratio is roughly 1:1, but you can add extra brown sugar for a sweeter sauce.

Place the corned beef on a large piece of aluminum foil on a baking sheet. Liberally spread the brown sugar and mustard glaze on the widest part of the corned beef. Wrap in foil to seal completely.

Bake the corned beef for about 20 minutes or until the glaze begins to darken and get crusty.

Remove from oven and allow to cool for 10-15 minutes.

Slice and enjoy!

spacer

Adoption Talk and… a Zucchini Recipe

Yes, I know these topics don’t mix… at all! 😉

I know it’s been quiet around here lately. To be honest, I don’t really have a lot to talk about.

We have been discussing children – both biological and foster adoption – quite a lot lately. More than likely we will be adopting a “sibling group” of 2 kids. As I want a little one and he wants an older one, if we can get like a pre-teen/ teenager and a 2-4 year old, we’d both be happy. Granted, I have no idea when this will all take place. We’re not to that level just yet. We are, however, extremely fortunate to have a friend that licenses foster homes and knows the in’s and out’s of that part of the system. We did decide that fostering before adoption makes a lot more sense than flat out adoption. To our current thinking, it would give us all a chance to make sure the kids would be a good fit with us. This may be the wrong way to think, but there is still a lot of research to be done!

In other new, I have been cooking a LOT! Our new crock pot gets used 2-3 times a week with all sorts of delicious meat, pork or chicken recipes. A few I’ve followed recipes (or rather adapted) and a few I’ve just plain made up. The latest was an adaption and by far my favorite… shredded beef and veggies over garlic brown rice. DELISH!

I’ve been perusing the SparkRecipes.com website quite a lot and most of them are from there. Today, I decided to put the zucchini’s I bought last week to good use with this recipe. Zucchini Crisps recipe adapted slightly. My changes are in pink.

Ingredients

1 medium fresh zucchini (2 medium)
1/4 cup egg beaters or egg whites (I used 2 whole eggs & prob woulda been fine with 1)
1/4 cup grated Parmesan cheese (½ cup as I doubled the zucchini)

Directions

  • Pre-heat oven to 425.
  • Slice zucchini in round slices. Make slices thicker for more al dente and thinner for a softer, more cooked texture. (About 1/4” is the perfect size)
  • Pour parmesan cheese into a zip lock baggie or freezer bag. Dip zucchini slices into egg beater and place in cheese bag. Close bag, shake until all pieces are coated and place on a non-stick baking sheet. Feel free to shake remaining bag mixture over zucchini. (I dipped and shook in 2 parts bc I only have quart baggies.)
  • Bake for 15 minutes or until cheese starts to melt and brown.
  • Tastes great with a marinara or ranch dipping sauce! (Or plain!)

Number of Servings: 2 (4… or lots of snacks. Mine made roughly 30 pieces. YMMV.)

I had a few with a plateful of brown rice and shredded beef with veggies for lunch. Little slice of heaven.

So how have you been? Are you adopted or contemplating adoption? What are your thoughts on foster adoption? I’d love to get your input!

spacer

Contemplating a Blog Split

Hello friends!

I have a bit of a dilemma here. Well, it’s really not a dilemma, but I do want to expand my blog a bit and think this might do the trick.

Have y’all noticed my increase in posts about baking? Even before I received my amazing new best friend KitchenAid stand mixer, I was always a big fan of cooking and baking. This passing fancy has certainly expanded over the last few weeks. To the point that I’m heavily considering creating a tab specifically for baking and creating a new default page where you’d pick normal blog or foodie blog. Eventually this would expand to pregnancy/ adoption, foodie, and other stuff.

As I was making butter earlier and taking lots of pictures for yet another foodie post, I started thinking about this. I mean, does it make sense to have all the posts mixed in together? Would it make a difference in my RSS feed? That I don’t know and do need to look into before making any changes. Does anyone know? My current RSS points directly to my home page. What will happen if I change my front page to a Pick Your Feed type page?

Of course, before I go ahead with this switch, I need to figure out the details first. Any help would be greatly appreciated!

spacer

Chocolate Chip-Walnut Cookies

What? How do those relate to babies, weddings or knitting?

Well, the next month 26 days is all about testing desserts for our reception. These are potential winners! My favorite site for recipes is definitely Annie’s Eats as she has stuff from every imaginable category, but is a great writer to boot! So yes, I took her Thick and Chewy Chocolate Chip Cookies recipe and split the chips to about 3/4 cup and added 3/4 cup of chopped walnuts. OK, more like “chopped then smashed up even smaller by hand” walnuts.

In case there was any doubt how big these suckers were...

Last weekend I broke in our new KitchenAid Stand Mixer by whipping up Annie’s Challah recipe. While delicious, I’m really not sure how she got such a huge loaf. It was delicious and been requested to have a presence at the reception. Guess I’ll be playing with it a lot more in the coming weeks.

Check her site out, and be sure to let me know what kinda stuff you’ve made!

spacer

Making Apple Butter, Attempt #1

So tonight I decided to make apple butter. My contribution to our huge joint family Thanksgiving is the biscuits I made last week (smaller and lots more) and figured I’d give apple butter a try to serve with them.

I’d found a recipe last week that looked pretty simple. Last night I bought all the ingredients that we didn’t have and after hubby left for work tonight, I started chopping up the apples.

Ingredients
4 pounds of Granny Smith (or other sweet/tart) apples peeled and cored
1/3 cup fresh pressed apple juice (not from concentrate)
2/3 cup maple syrup (or use dark brown sugar)
2 tsp vanilla extract
1 tbsp fresh lemon juice
Ground cinnamon, nutmeg, ginger, and/or cloves to taste

I tossed everything into a big pot like the recipe said. First the apples, then the juices, then the sugar and spices go in last. I covered the pot and kicked the stove to medium high (6-7 on my stove) and let it boil.

Oh, my modifications are:

  • 4lb mini Granny Smith apples (I didn’t take the coring into account so it ended up being less)
  • Martinelli apple juice instead of fresh pressed
  • I only used Ginger and Cinnamon as I didn’t have other spices

After boiling, I stirred everything to ensure the mixture coated all the apples, then turned the stove down to 2-3 and simmered for 30 minutes.

After making sure they were soft enough (OK, so I used a potato masher to test this), I scooped about a cup at a time into my mini food processor to puree the heck outta the apples. There’s still some chunks. I fail at this sometimes. Also, had I used the immersion blender from my wedding registry, it probably would’ve turned out a lot smoother.

It was still pretty wet, like apple sauce, so  I dumped everything back into the pot and simmered it for 15 minutes at a time to “dry it out” as suggested by my twitter friend Susan. It took well over 2 hours to get the right consistency, and burned the whole entire bottom of the pot. Le sigh. Maybe I’m not meant to make apple butter.

I’m going to test it again in the morning. Right now it’s cooling and then going into the fridge. Fingers crossed!

spacer